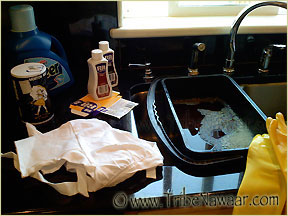
First assemble all the supplies you will need in your work area
Custom dyeing costuming can be messy, so choose an area where dye stains won’t be a problem. You will need to consult the dye manufacturer’s guide for safety precautions, recommended supplies, use and clean up before beginning as each company will have specific suggestions that may vary from those listed below.
Supplies
 -Choli Top
Our dyeable cotton-lycra choli tops are assembled with dyeable thread that will give you seamless color from fabric to thread
-Standard To Professional Grade Dye(s)
If you are custom matching an existing color or costuming piece you may need more than one color of dye
-Large Pot (For Stovetop) Or Large Bucket
I recommend purchasing a pot/bucket that will be used exclusively for dye projects to avoid health and staining issues
-Salt
-Fabric Detergent
-Rubber Gloves
Basic Dyeing Instructions
For ease let’s assume you will be using a liquid dye from RIT (as this is easily found in most US craft, fabric and larger grocery stores) and that you will not be doing any custom color tones.
1) Prepare Dye Bath:
Add 1/2 bottle dye to 3 gallons of hot water for each pound of dry fabric. I find that I can get about 3 cholis dyed with double this amount. Add about a cup of salt to dye bath. For darker or richer colors double the dye quantity.
2) Prepare Choli:
Wet choli fabric thoroughly in clear warm water.
3) Basic Dye Process:
Put on your rubber gloves, open wet choli and gently dip into dye bath. Although many dye manufacturer’s instructions suggest simple stirring to get the fabric color tone even, I recommend stirring or hand agitating mixed with gently lifting the fabric in and out of the dye bath (unwrinkling the fabric as you lift). This will help to reduce the chances of an uneven color. It is best to provide constant agitation thru the dye process. Choli tops typically requires 30-45 minutes in the dye bath.
4) Clean Up:
Starting with hot water, begin rinsing choli. As rinse water becomes more and more clear gradually adjust the rinse water temperature to cold. Continue cold water rinsing until water is completely clear. Hand or machine wash completed choli in warm water with detergent.
Clean up pots, buckets and any splatters with bleach (where bleach is safe to use).
Tips For Creating Custom Colors
When you want to dye your choli a color that is not available with prefabricated dyes
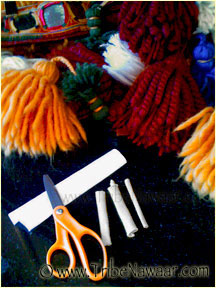
 For this project I needed to create a choli that matched the saffron colored tassels in the belt. Looking at the color in the tassel I could see that it contained shades of yellow, orange and warm red with a tone that was vibrant, but, still somewhat muted.
A note on color matching-
Matching colors can be easy or difficult depending on a variety of factors including:
-one’s ability to see the base color components that make up specific complex colors
-color assortment of dyes readily available
-difficult colors.. certain colors are just plain hard to replicate!
I decided to acheive this color blend I would use a mix of yellow, wine and warm brown dyes.
It is always best to perform a test on a scrap first. I usually will try to keep little bits of the dyeable choli fabric around. If you let me know when you place your order that you would like a scrap piece I am always happy to put a piece in with your choli
Guessing about how many tests I might have to do, I cut 3 small scrap bits.
 I began with using 1 full box of yellow, combined with one cap of the wine for my dye bath.
The resulting color (far left test piece in the image on the right) was a bright yellow.
For the second test I added a couple drops of warm brown and another cap full of wine to the existing dye bath. This color (middle piece) was close, but, still a bit bright and yellow.
For the last test I added a few drops of wine and a couple more drops of warm brown to the existing dye bath and the resulting color was perfect (far right piece). I could now proceed to dye the choli.
 Once the dye bath color is figured out for custom colors the rest is just a matter of following the basic dyeing instructions to finish making your choli! Now you will have a choli that is a one of a kind, unique expression of your own sense of style!
You can use these tips to dye cholis, skirts, and pants!
Enjoy!
~Jennifer
Text & images © 2002- 2017 Tribe Nawaar, Content written by Jennifer Secrist Goran of Tribe Nawaar. If found elsewhere, either in pieces or in entirety, it has been stolen from our site.


